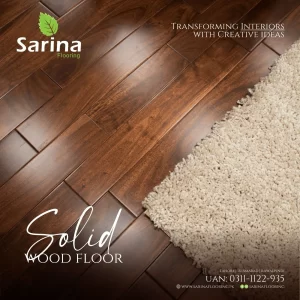
Herringbone wooden flooring is the ultimate definition of luxury and beauty. It is one of the most popular choices of Aesthetic lovers in modern homes.
It is a type of Parquet. The name herringbone is from its similarities to the skeleton of the herring fish. There are many other parquet floorings available. It includes chevron, basket style, and Versailles style.
Defining Herringbone Wooden Flooring
It is one of the patterns from parquet flooring. It was known to be solid wood. Therefore, many couldn’t afford to buy it despite its undeniable beauty and hardwearing. Hence, The flooring companies came up with engineered parquet floors. It included many patterns, including Herringbone. Thus, making it a unique yet affordable option for you.
The patterns speak of themselves. Herribonge is played rectangular at 90-degree angles. Thus creating a zigzag pattern that is repeated horizontally and vertically.
Pros of Choosing Herringbone Wooden Flooring
- Parquet flooring is long-lasting and hardwearing; hence the cost of wear and tear would be far less than many others in the market.
- The herringbone pattern is famous for its durability, so it won’t quickly wear out.
- It fits any style and décor, be it traditional or contemporary.
- The flooring is available in different sizes, so you don’t have to worry about the right fit.
- It is available in variants of color and pricing options so that it can fit your pocket easily.
- The maintenance and care are easy, and anyone can do it within no time.
- Herringbone floors are timeless.
What to consider while choosing the best fit of herringbone wooden flooring for your project?
One gets confused while opting for the right fit. While doing so, many aspects slip out of my mind. Following are two perspectives one should keep in mind before purchasing Herringbone for their project:
Practical Considerations When Choosing Herringbone Flooring
- Humidity and moisture
Whether you choose engineered wood or solid, your placement would be affected by moisture and humidity levels.
- Space and its size
Your budget will get affected by the size of your space. It will be worth pushing your limits if you have a compact space.
- Type of floor
Your floor matters. Know your floor type beforehand. Floating floors have a noise cancellation effect. It Is dependent on the subfloor layer you have.
Aesthetic Considerations When Choosing Herringbone Flooring
- Colour aesthetics
Colouring matching or go in contrast, there is a variety of colored flooring available to fit your desire.
- Design
Herringbone has a simple design. You can place them horizontally or vertically based on your desire.
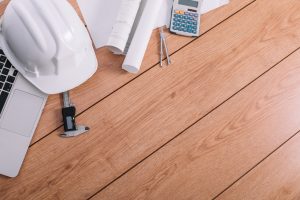
Installation of herringbone wood flooring
Prepping the floor :
Beginning with the subfloor, you should level it beforehand. Alongside you should check the moisture level. The next step counts the measurement of the floor. Let the professionals measure it for you if you cannot do it alone. Hence, the cutouts won’t be accordingly.
The next step is choosing the word, whether sold or engineered. Make sure you recheck the desired color, species, and grade.
Moreover, it would help if you decided whether you need a floating floor or a fully bonded base. Followed by the decision of whether you will be installing it on your own or asking a contractor.
Make sure you read and reread all the installation processes, and don’t miss out on any line.
Gathering instruments and bonding material
Mix the flooring material. Now spread it evenly with a spreading tool. The flooring mixture is incorporated as per your design,
Furthermore, you should divide the planks into the left and right sides accordingly.
Gather your tools, including chalk hammer, screwdriver, tape measure, and handsaw, and you might also need a jigsaw.
The next step involves ensuring the doors won’t fit over; if possible, you might take them out for perfection. Set out the flooring to avoid mistakes, and provide you to allow around 10-12mm around the edges as an expansion gap.
laying out the panels
Next, Line up the starter board with the top corner—double Check all angles and measurements before continuing. Next, measure 27mm on each side and mark these two lines, A and B, with chalk. These are your guidelines. The Y line is in the middle between your A planks and B planks.
Line up the starter board with the top corner on your B line.
Moreover, Lay it out in three rows to enable you to mark out the next set of guidelines (C and D lines) and so on until you have policies over the whole area.
Finally, if you are using adhesive, ensure you only spread an area that you can comfortably fit in 20 minutes so that it does not dry out.
It is a work of art and precision. We recommend asking a contractor that wouldn’t charge a hefty amount before doing it yourself. Using tools might hurt you and probably damage your fitting. Therefore, read all precautions and manuals correctly.